
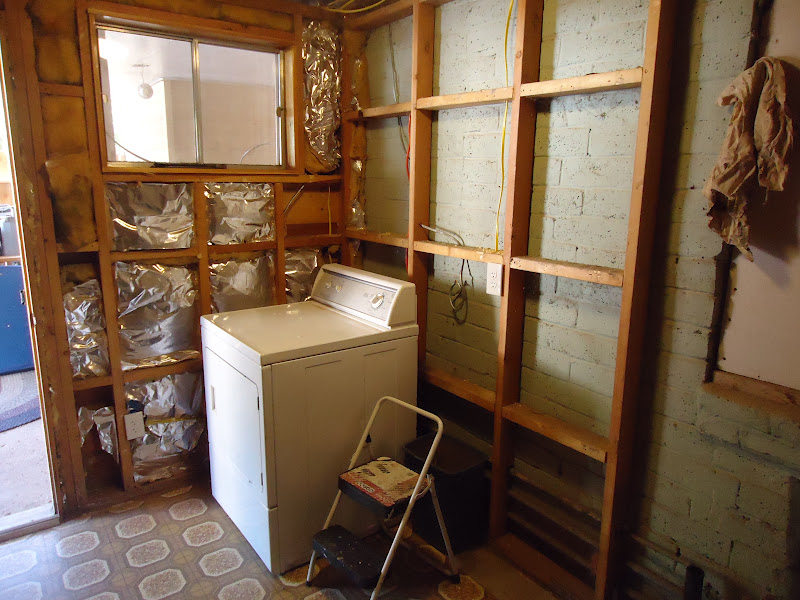
This is the room we've taken to calling the Mud Room. It's where both Chrisi and Angus spent a good deal of time. The dog door is there and we used it as 'temporary' storage as well. Time to strip it down to bare walls.

Everything had to go including all this wood paneling.


Behind that door is access to the main water lines to the house. The lines run behind the walls stage left in this picture, outside to the old water softener and then back to the main house feeder line. There's some 110 outlets but no 220.

Nice ceiling huh?

Getting started stripping the walls. Note the storage area on the left. We tend to accumulate stuff and temporary becomes semi permanent pretty quick.

This is a shot of the end grain of the paneling. Kaibab, straight from the Kaibab forest just north of us. This is probably circa 1950 or so.You can't find stuff like this anymore, at affordable prices anyway, so I'll hang on to it and try to find a good use for it later. No idea where but I am a pack rat.

Down to bare walls but we're still not done with deconstruction. All that needs to come out as well, right down to naked studs. Heh heh. Naked studs.

The wood on the walls is firring strips that the wood panels were nailed to. With about half a million nails.

Getting down to the stud walls. That is most emphatically not dry wall. It's a type of cheap wall board that is both flimsy and difficult to remove. I hate it with a red hot hatred of hatiness.

After a couple of days of pulling and hammering and prying and toting and lifting we're down to bare walls at last. Oh happy day! You can see the plumbing hookups over in the corner which is going to simplify the plumbing something fierce. That piece of white wall board behind the vent pipe? That's the old window opening in the original building. Just on the other side of that block wall is the kitchen.


Ok, time for some new wiring. I've complained for a long time that every 110 outlet in this house is ungrounded. That is simple two prong outlets. In time I will completely rewire the entire house, starting with this room. The yellow line is Romex, 12/2 with ground. One outlet on this wall for the washer (with GFCI) and one on the wall to the left for general use. The orange is 8 gauge with neutral and ground. That's the 220 line for the dryer. It also gets a GCFI breaker.

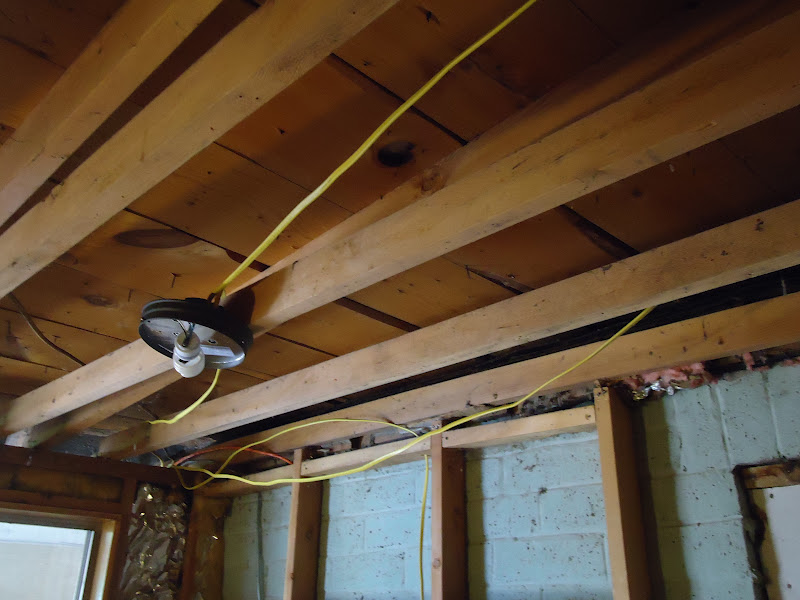
This is the north wall where the new water softener is going. It gets a 110 line for the softener and a wall switch for the overhead light.

And the overhead light. I always used to get confused when wiring up light fixtures to wall switches until my buddy clued me in. Here's how I remember how to wire a single fixture/switch. Remember that with Romex the white wire is neutral, the black is power and the bare copper is ground. At the service box you connect the cable normally to the breaker with the bare copper going to a common ground. From the breaker you run a line to the light fixture box then another separate line from the fixture box to the switch box. Ok. At the light fixture box you wire nut the two ground wires together. You're left with two white and two black wires at the fixture, one set from the breaker and the other from the switch. The black (power) wire from the breaker gets wire nutted to the white (neutral) wire to the switch. You're then left with the black (power) wire from the switch and the white (neutral) from the breaker. You then just hook up both the light fixture and the wall switch. It sounds confusing trying to describe it but in use it works great. When done correctly you've got power going to the switch from the breaker (through the fixture box) and then to the light from the switch and a neutral from the light back to the breaker which completes the circuit plus a common ground for the entire circuit. All you have to remember is at the light box you want white from the breaker, black from the switch. Hook everything else together with bare copper going to bare copper and black going to white. Hook up the switch (including the bare copper ground) and wire in the light fixture and you're golden. Easy Peasy.

All wired up and the dryer in place. Everything works just fine. I've covered the outlets and switches but left the walls bare for the time being. I have plumbing to run and walls to move so no drywall for a while yet.
Tomorrow plumbing. Here's a sneak peak.

Pex and Shark Bytes aka Plumbing for Dummies. Oh yeah.
Six
6 comments:
Nice work!
Thanks brother. Wait til tomorrow. It gets way worse!!
You are so talented!
Waiting to see the "it gets worse"
Man, I wish I had your talent!
The wife says to stop by when your done... she has some ideas for our house...
Nice work...
Dann in Ohio
Thanks Girl and ML. You guys may be the first people ever ever to call me talented. I'm gonna have to buy some new hats if you two keep that up :)
Thanks Dann. Tell her I'm always at her disposal.
Post a Comment